使用Wio Terminal读取传感器的实时数据Seeeduino V4.2开发板接收数据,接收数据PC以服务端为基础,Wio Terminal作为客户端,传感器可以在同一局域网下通过串口传输到服务器。
下面是我在用的Wio Terminal读取传感器实时数据的思路:
将Seeed-BME使用680获取的数据WEB前端展示
串口传回的数据用正则表达式排序
使用Wio Terminal做HTTP请求并显示数据
1. 将Seeed-BME使用680获取的数据WEB前端展示
在这里用Django可能看起来有点heavy,我的想法是在后期做一个数据管理端,做一些数据分析,所以这个Django我将继续改进这个项目。
我之前做的前端以字符串的形式显示:
这样其实不太好,如果这样写的话,Wio Terminal就要在做HTTP请求时提取数据,导致刷新时间过长
所以这里要做一些改进,把数据改成Json串:
import json
def index(request):
datas = getDatas()
content = {
'temperature':datas[0],
'pressure':datas[1],
'humidity':datas[2],
'gas':datas[3],
'updataTime':datas[4],
}
jsonData = json.dumps(content)
return HttpResponse(jsonData)
此时前端页面如下:
虽然这是一个前端页面,但它不是为用户看到的。这个页面是供应的Wio Terminal使用请求数据
2. 串口传回的数据用正则表达式排序
我们在前面留了一个getDatas()没有提到原来的方法。getDatas()方法只是简单的获取数据,没有处理数据:
def getDatas():
serialPort = "COM10" # 串口
baudRate = 9600 # 波特率
ser = serial.Serial(serialPort, baudRate, timeout=0.5)
# print("参数设置:串口=%s ,波特率=%d" % (serialPort, baudRate))
while True:
str = ser.readline().decode('utf-8')
if str.strip()!='':
print(str)
updata_time = datetime.datetime.now().strftime('%F %T')
print(updata_time)
return str,updata_time
这里的改进是通过正则表达式提取数据:
import re
import serial
import datetime
def getDatas():
serialPort = "COM10" # 串口
baudRate = 9600 # 波特率
ser = serial.Serial(serialPort, baudRate, timeout=0.5)
# print("参数设置:串口=%s ,波特率=%d" % (serialPort, baudRate))
while True:
lists = []
strs = ser.readline().decode('utf-8')
if strs.strip()!='':
print(strs)
str = re.finditer(r"(\d ).(\d )",strs)
for item in str:
# print(item.group())
lists.append(float(item.group()))
updata_time = datetime.datetime.now().strftime('%F %T')
# print(updata_time)
lists.append(updata_time)
print(lists)
return lists
其实就是提取数据,提取字符串中的有效信息,先存储在列表中:
简单讲讲我这里用到的正则表达式:
re.finditer(r"(\d ).(\d )",strs)
要提取的有效数据是带小数点后两位数, \d 表示匹配任何数字,等于0-9,但小数点不是数字 ,所以不会匹配,所以正则表达式可以写成: “(\d ).(\d )”
3. 使用Wio Terminal做HTTP请求并显示数据
前两部分是这部分的基础,主要是Arduino的知识
做的时候主要考虑三点:
连接WIFI并做HTTP请求
我拿到的Wio Terminal是样品,在使用无线连接之前Wio Terminal上更新Wireless Core Realtek RTL8720的最新固件应该已经刷好了。上传程序后,串口出现以下输出:
这时可以试着重新尝试flash,具体方法请参考官方文件:
https://wiki.seeedstudio.com/Wio-Terminal-Network-Overview/
这一步解决后,连接WIFI不应该是问题。看官方文件很容易解决。我在这里谈一些特殊的部分。官方文件给出了一个HTTPS的请求demo:
因为我现在只在局域网共享数据,所以我使用它HTTP请求。这里需要一些网络协议知识,可以使用HTTPS协议理解为HTTP协议的升级是在HTTP数据加密是在此基础上添加的,即SSSL。
有了这个基础就好办了。我们只需要稍微修改一下官方给出的示例程序。先看看。HTTPS请求:
#include
const char* ssid = "yourNetworkName"; // your network SSID
const char* password = "yourNetworkPassword"; // your network password
const char* server = "www.example.com"; // Server URL
const char* test_root_ca = \
"-----BEGIN CERTIFICATE-----\n"
"MIIDrzCCApegAwIBAgIQCDvgVpBCRrGhdWrJWZHHSjANBgkqhkiG9w0BAQUFADBh\n"
"MQswCQYDVQQGEwJVUzEVMBMGA1UEChMMRGlnaUNlcnQgSW5jMRkwFwYDVQQLExB3\n"
"d3cuZGlnaWNlcnQuY29tMSAwHgYDVQQDExdEaWdpQ2VydCBHbG9iYWwgUm9vdCBD\n"
"QTAeFw0wNjExMTAwMDAwMDBaFw0zMTExMTAwMDAwMDBaMGExCzAJBgNVBAYTAlVT\n"
"MRUwEwYDVQQKEwxEaWdpQ2VydCBJbmMxGTAXBgNVBAsTEHd3dy5kaWdpY2VydC5j\n"
"b20xIDAeBgNVBAMTF0RpZ2lDZXJ0IEdsb2JhbCBSb290IENBMIIBIjANBgkqhkiG\n"
"9w0BAQEFAAOCAQ8AMIIBCgKCAQEA4jvhEXLeqKTTo1eqUKKPC3eQyaKl7hLOllsB\n"
"CSDMAZOnTjC3U/dDxGkAV53ijSLdhwZAAIEJzs4bg7/fzTtxRuLWZscFs3YnFo97\n"
"nh6Vfe63SKMI2tavegw5BmV/Sl0fvBf4q77uKNd0f3p4mVmFaG5cIzJLv07A6Fpt\n"
"43C/dxC//AH2hdmoRBBYMql1GNXRor5H4idq9Joz EkIYIvUX7Q6hL hqkpMfT7P\n"
"T19sdl6gSzeRntwi5m3OFBqOasv zbMUZBfHWymeMr/y7vrTC0LUq7dBMtoM1O/4\n"
"gdW7jVg/tRvoSSiicNoxBN33shbyTApOB6jtSj1etX jkMOvJwIDAQABo2MwYTAO\n"
"BgNHQ8BAf8EBAMCAYYwDwYDVR0TAQH/BAUwAwEB/zAdBgNVHQ4EFgQUA95QNVbR\n"
"TLtm8KPiGxvDl7I90VUwHwYDVR0jBBgwFoAUA95QNVbRTLtm8KPiGxvDl7I90VUw\n"
"DQYJKoZIhvcNAQEFBQADggEBAMucN6pIExIK+t1EnE9SsPTfrgT1eXkIoyQY/Esr\n"
"hMAtudXH/vTBH1jLuG2cenTnmCmrEbXjcKChzUyImZOMkXDiqw8cvpOp/2PV5Adg\n"
"06O/nVsJ8dWO41P0jmP6P6fbtGbfYmbW0W5BjfIttep3Sp+dWOIrWcBAI+0tKIJF\n"
"PnlUkiaY4IBIqDfv8NZ5YBberOgOzW6sRBc4L0na4UU+Krk2U886UAb3LujEV0ls\n"
"YSEY1QSteDwsOoBrp+uvFRTp2InBuThs4pFsiv9kuXclVzDAGySj4dzp30d8tbQk\n"
"CAUw7C29C79Fv1C5qfPrmAESrciIxpg0X40KPMbp1ZWVbd4=\n"
"-----END CERTIFICATE-----\n";
// You can use x.509 client certificates if you want
//const char* test_client_key = ""; //to verify the client
//const char* test_client_cert = ""; //to verify the client
WiFiClientSecure client;
void setup() {
//Initialize serial and wait for port to open:
Serial.begin(115200);
while(!Serial); // Wait for Serial to be ready
delay(1000);
Serial.print("Attempting to connect to SSID: ");
Serial.println(ssid);
WiFi.begin(ssid, password);
// attempt to connect to Wifi network:
while (WiFi.status() != WL_CONNECTED) {
Serial.print(".");
// wait 1 second for re-trying
delay(1000);
}
Serial.print("Connected to ");
Serial.println(ssid);
client.setCACert(test_root_ca);
//client.setCertificate(test_client_key); // for client verification
//client.setPrivateKey(test_client_cert); // for client verification
Serial.println("\nStarting connection to server...");
if (!client.connect(server, 443)) {
Serial.println("Connection failed!");
} else {
Serial.println("Connected to server!");
// Make a HTTPS request:
client.println("GET https://www.example.com HTTP/1.0");
client.println("Host: www.example.com");
client.println("Connection: close");
client.println();
while (client.connected()) {
String line = client.readStringUntil('\n');
if (line == "\r") {
Serial.println("headers received");
break;
}
}
// if there are incoming bytes available
// from the server, read them and print them:
while (client.available()) {
char c = client.read();
if (c == '\n') {
Serial.write('\r');
}
Serial.write(c);
}
client.stop();
}
}
void loop() {
// do nothing
}
WiFiClientSecure这个类是用来做HTTPS请求的,用setCACert(test_root_ca)进行认证
做HTTP请求时改成WiFiClient即可,并且不需要认证,这时我们就可以把很多代码都删掉了:
#include
const char* ssid = "yourNetworkName"; // your network SSID
const char* password = "yourNetworkPassword"; // your network password
const char* server = "Server URL"; // Server URL
WiFiClient client;
void setup() {
//Initialize serial and wait for port to open:
Serial.begin(115200);
while(!Serial); // Wait for Serial to be ready
delay(1000);
Serial.print("Attempting to connect to SSID: ");
Serial.println(ssid);
WiFi.begin(ssid, password);
// attempt to connect to Wifi network:
while (WiFi.status() != WL_CONNECTED) {
Serial.print(".");
// wait 1 second for re-trying
delay(1000);
}
Serial.print("Connected to ");
Serial.println(ssid);
Serial.println("\nStarting connection to server...");
if (!client.connect(server, 9000)) {
Serial.println("Connection failed!");
} else {
Serial.println("Connected to server!");
// Make a HTTP request:
String postRequest =(String)("GET ") + "/ HTTP/1.1\r\n" + "Connection: close\r\n\r\n";
Serial.println(postRequest);
client.print(postRequest);
while (client.connected()) {
String line = client.readStringUntil('\n');
if (line == "\r") {
Serial.println("headers received");
break;
}
}
// if there are incoming bytes available
// from the server, read them and print them:
while (client.available()) {
char c = client.read();
if (c == '\n') {
Serial.write('\r');
}
Serial.write(c);
}
client.stop();
}
}
void loop() {
// do nothing
}
这里需要注意的是client.connect(server, 9000),9000是我的端口,这里要选择正确的端口,否则是不能请求成功的;另外,我把PC端当作服务器,所以Server URL就是我的IP地址。
发送HTTP请求,最重要的是这部分:
// Make a HTTP request:
String postRequest =(String)("GET ") + "/ HTTP/1.1\r\n" + "Connection: close\r\n\r\n";
Serial.println(postRequest);
client.print(postRequest);
如果请求成功,终端会给出提示:
这个请求怎么写呢?这里其实有个好方法,想用浏览器访问,然后回终端看浏览器是怎么请求的,我们再照猫画虎即可。
获取数据并在LCD屏上显示
读取数据主要用到ArduinoJson这个库:
//ArduinoJson to parse data, plesae check ArduinoJson for more info
const size_t capacity = JSON_OBJECT_SIZE(5) + 100;
DynamicJsonDocument doc(capacity);
deserializeJson(doc, data);
float temperature = doc["temperature"];
float pressure = doc["pressure"];
float humidity = doc["humidity"];
float gas = doc["gas"];
String updataTime = doc["updataTime"];
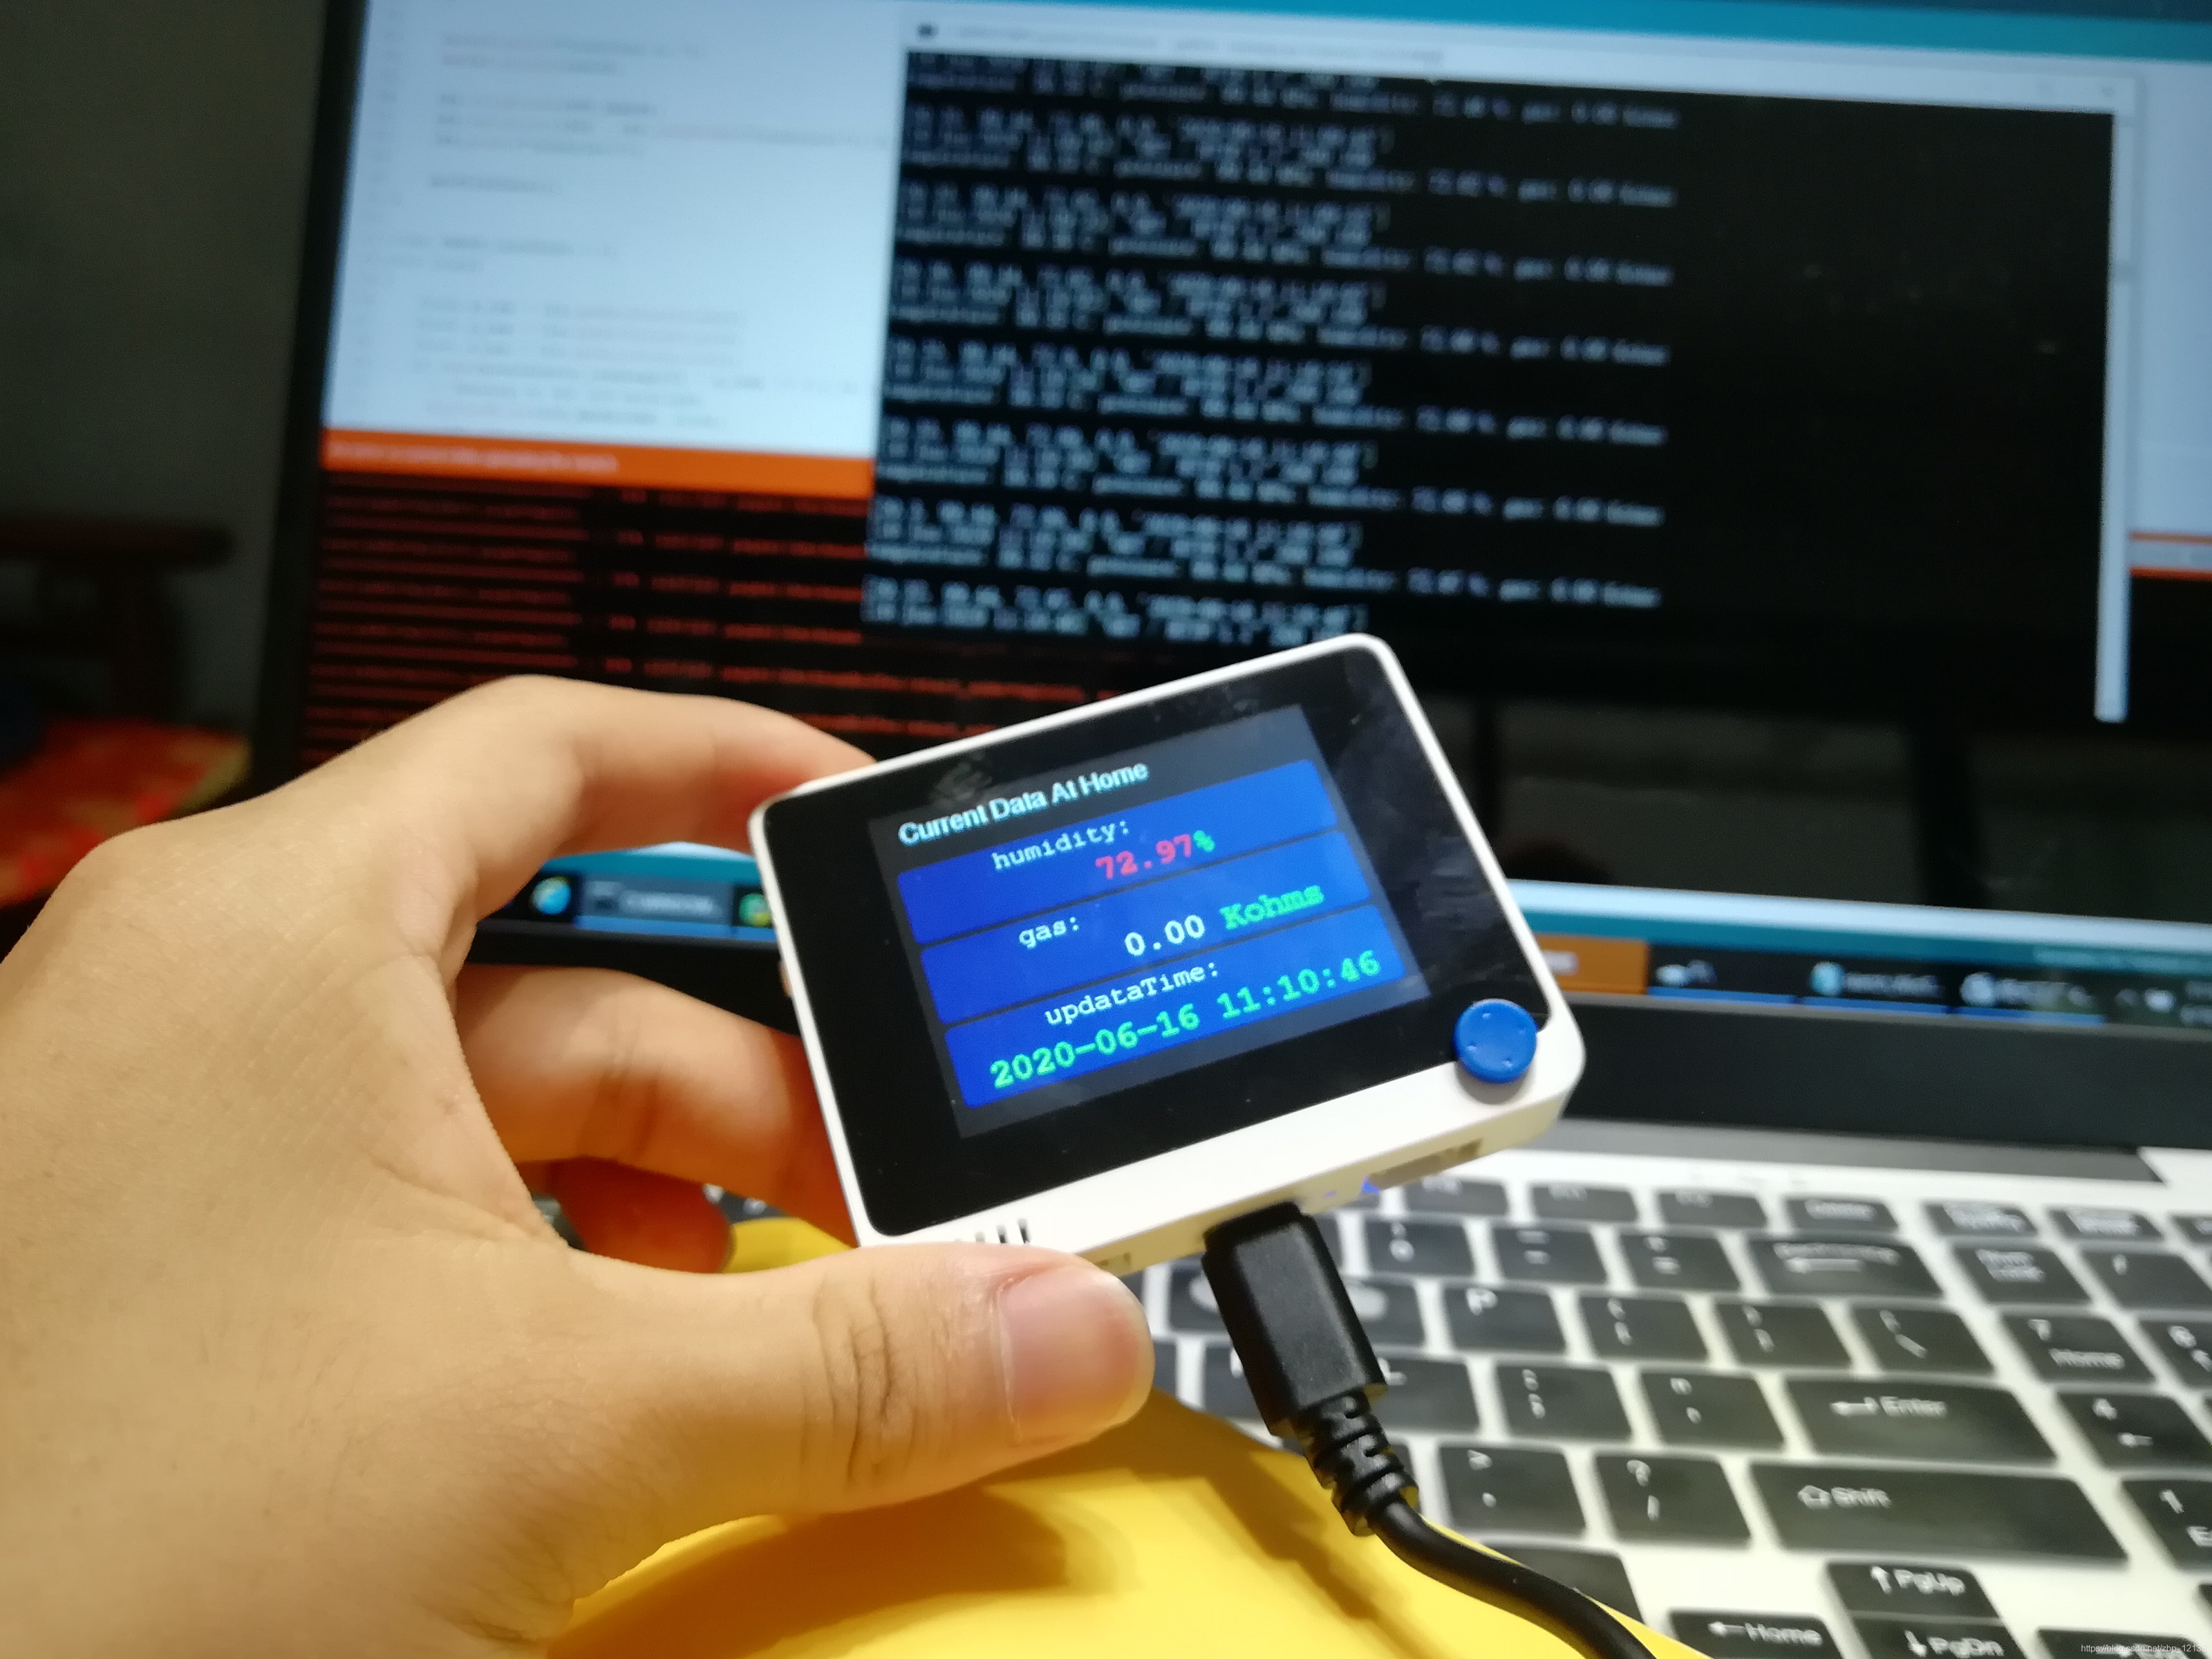
把五个数据都读取出来,显示就很简单了。因为Wio Terminal的屏幕很小,所以我分了两页存放,原理都是相同的:
// -----------------LCD---------------------
tft.setFreeFont(FF17);
tft.setTextColor(tft.color565(224,225,232));
tft.drawString("Current Data At Home",20,10);
tft.fillRoundRect(10, 45, 300, 55, 5, tft.color565(40,40,86));
tft.fillRoundRect(10, 105, 300, 55, 5, tft.color565(40,40,86));
tft.fillRoundRect(10, 165, 300, 55, 5, tft.color565(40,40,86));
tft.setFreeFont(FM9);
tft.drawString("temperature:", 75, 50);
tft.drawString("pressure:",75, 110);
tft.drawString("humidity:",75, 170);
tft.setFreeFont(FMB12);
tft.setTextColor(TFT_RED);
tft.drawFloat(temperature,2 , 140, 75);
tft.setTextColor(tft.color565(224,225,232));
tft.drawFloat(pressure,2 , 140, 135);
tft.setTextColor(TFT_GREEN);
tft.drawFloat(humidity,2 , 140, 195);
tft.drawString("℃", 210, 75);
tft.drawString("KPa",210, 135);
tft.drawString("%",210, 195);
文字的摆放位置我是慢慢试出来的,这里要有耐心:
通过待机来省电
当然,在实际应用上,如果一直亮着屏幕,是很浪费电的,因此我结合加速度传感器,设置了一个待机状态,晃动Wio Terminal时才亮屏。
这块其实也很好做,在loop()里做就好了:
void loop()
{
float x_raw = lis.getAccelerationX();
float y_raw = lis.getAccelerationY();
float z_raw = lis.getAccelerationZ();
if (abs(accelerator_readings[0] - x_raw) >= 0.1 && abs(accelerator_readings[1] - y_raw) >= 0.1 && abs(accelerator_readings[2] - z_raw) >= 0.1){
// Turning on the LCD backlight
digitalWrite(LCD_BACKLIGHT, HIGH);
getFirstData();
delay(3000);
getLastData();
delay(3000);
}
else {
// Turning off the LCD backlight
digitalWrite(LCD_BACKLIGHT, LOW);
delay(500);
}
for (uint8_t i = 0; i<3; i++){
accelerator_readings[i] = 0.0; //this is used to remove the first read variable
}
accelerator_readings[0] = x_raw; //store x-axis readings
accelerator_readings[1] = y_raw; //store y-axis readings
accelerator_readings[2] = z_raw; //store z-axis readings
}
Wio Terminal自带三个加速度传感器,效果还是很理想的。
完整的代码
#include
#include
#include"LIS3DHTR.h"
#include"Free_Fonts.h"
#include"TFT_eSPI.h"
TFT_eSPI tft;
LIS3DHTR lis;
WiFiClient client;
const char* ssid = "zh213";
const char* password = "zh213wei";
const char* server = "192.168.1.102"; // Server URL
String data;
float accelerator_readings[3];
void setup() {
//Initialize serial and wait for port to open:
Serial.begin(115200);
delay(100);
pinMode(WIO_5S_PRESS, INPUT_PULLUP);
lis.begin(Wire1);
lis.setOutputDataRate(LIS3DHTR_DATARATE_25HZ);
lis.setFullScaleRange(LIS3DHTR_RANGE_2G);
float x_raw = lis.getAccelerationX();
float y_raw = lis.getAccelerationY();
float z_raw = lis.getAccelerationZ();
accelerator_readings[0] = x_raw; //store x-axis readings
accelerator_readings[1] = y_raw; //store y-axis readings
accelerator_readings[2] = z_raw; //store z-axis readings
Serial.print("Attempting to connect to SSID: ");
Serial.println(ssid);
WiFi.begin(ssid, password);
tft.begin();
tft.setRotation(3);
tft.fillScreen(TFT_BLACK);
tft.setFreeFont(FMB12);
tft.setCursor((320 - tft.textWidth("Connecting to Wi-Fi.."))/2, 120);
tft.print("Connecting to Wi-Fi..");
// attempt to connect to Wifi network:
while (WiFi.status() != WL_CONNECTED) {
Serial.print(".");
// wait 1 second for re-trying
delay(1000);
}
Serial.print("Connected to ");
Serial.println(ssid);
tft.fillScreen(TFT_BLACK);
tft.setCursor((320 - tft.textWidth("Connected!"))/2, 120);
tft.print("Connected!");
getFirstData();
}
void loop()
{
float x_raw = lis.getAccelerationX();
float y_raw = lis.getAccelerationY();
float z_raw = lis.getAccelerationZ();
if (abs(accelerator_readings[0] - x_raw) >= 0.1 && abs(accelerator_readings[1] - y_raw) >= 0.1 && abs(accelerator_readings[2] - z_raw) >= 0.1){
// Turning on the LCD backlight
digitalWrite(LCD_BACKLIGHT, HIGH);
getFirstData();
delay(3000);
getLastData();
delay(3000);
}
else {
// Turning off the LCD backlight
digitalWrite(LCD_BACKLIGHT, LOW);
delay(500);
}
for (uint8_t i = 0; i<3; i++){
accelerator_readings[i] = 0.0; //this is used to remove the first read variable
}
accelerator_readings[0] = x_raw; //store x-axis readings
accelerator_readings[1] = y_raw; //store y-axis readings
accelerator_readings[2] = z_raw; //store z-axis readings
}
void getFirstData() {
Serial.println("\nStarting connection to server...");
if (!client.connect(server, 9000)) {
Serial.println("Connection failed!");
tft.fillScreen(TFT_BLACK);
tft.setCursor((320 - tft.textWidth("Connection failed!"))/2, 120);
tft.print("Connection failed!");
} else {
Serial.println("Connected to server!");
// Make a HTTP request:
String postRequest =(String)("GET ") + "/ HTTP/1.1\r\n" + "Connection: close\r\n\r\n";
Serial.println(postRequest);
client.print(postRequest);
while (client.connected()) {
String line = client.readStringUntil('\n');
if (line == "\r") {
Serial.println("headers received");
break;
}
}
while(client.available())
{
String line = client.readStringUntil('\r');
data = line;
}
Serial.println(data);
client.stop();
Serial.println("closing connection");
}
//ArduinoJson to parse data, plesae check ArduinoJson for more info
const size_t capacity = JSON_OBJECT_SIZE(5) + 100;
DynamicJsonDocument doc(capacity);
deserializeJson(doc, data);
float temperature = doc["temperature"];
float pressure = doc["pressure"];
float humidity = doc["humidity"];
// -----------------LCD---------------------
tft.setFreeFont(FF17);
tft.setTextColor(tft.color565(224,225,232));
tft.drawString("Current Data At Home",20,10);
tft.fillRoundRect(10, 45, 300, 55, 5, tft.color565(40,40,86));
tft.fillRoundRect(10, 105, 300, 55, 5, tft.color565(40,40,86));
tft.fillRoundRect(10, 165, 300, 55, 5, tft.color565(40,40,86));
tft.setFreeFont(FM9);
tft.drawString("temperature:", 75, 50);
tft.drawString("pressure:",75, 110);
tft.drawString("humidity:",75, 170);
tft.setFreeFont(FMB12);
tft.setTextColor(TFT_RED);
tft.drawFloat(temperature,2 , 140, 75);
tft.setTextColor(tft.color565(224,225,232));
tft.drawFloat(pressure,2 , 140, 135);
tft.setTextColor(TFT_GREEN);
tft.drawFloat(humidity,2 , 140, 195);
tft.drawString("℃", 210, 75);
tft.drawString("KPa",210, 135);
tft.drawString("%",210, 195);
}
void getLastData() {
Serial.println("\nStarting connection to server...");
if (!client.connect(server, 9000)) {
Serial.println("Connection failed!");
tft.fillScreen(TFT_BLACK);
tft.setCursor((320 - tft.textWidth("Connection failed!"))/2, 120);
tft.print("Connection failed!");
} else {
Serial.println("Connected to server!");
// Make a HTTP request:
String postRequest =(String)("GET ") + "/ HTTP/1.1\r\n" + "Connection: close\r\n\r\n";
Serial.println(postRequest);
client.print(postRequest);
while (client.connected()) {
String line = client.readStringUntil('\n');
if (line == "\r") {
Serial.println("headers received");
break;
}
}
while(client.available())
{
String line = client.readStringUntil('\r');
data = line;
}
Serial.println(data);
client.stop();
Serial.println("closing connection");
}
//ArduinoJson to parse data, plesae check ArduinoJson for more info
const size_t capacity = JSON_OBJECT_SIZE(5) + 100;
DynamicJsonDocument doc(capacity);
deserializeJson(doc, data);
float humidity = doc["humidity"];
float gas = doc["gas"];
String updataTime = doc["updataTime"];
// -----------------LCD---------------------
tft.setFreeFont(FF17);
tft.setTextColor(tft.color565(224,225,232));
tft.drawString("Current Data At Home",20,10);
tft.fillRoundRect(10, 45, 300, 55, 5, tft.color565(40,40,86));
tft.fillRoundRect(10, 105, 300, 55, 5, tft.color565(40,40,86));
tft.fillRoundRect(10, 165, 300, 55, 5, tft.color565(40,40,86));
tft.setFreeFont(FM9);
tft.drawString("humidity:", 75, 50);
tft.drawString("gas:",75, 110);
tft.drawString("updataTime:",75, 170);
tft.setFreeFont(FMB12);
tft.setTextColor(TFT_RED);
tft.drawFloat(humidity,2 , 140, 75);
tft.setTextColor(tft.color565(224,225,232));
tft.drawFloat(gas,2 , 140, 135);
tft.setTextColor(TFT_GREEN);
tft.drawString(updataTime , 30, 195);
tft.drawString("%", 210, 75);
tft.drawString("Kohms",210, 135);
}
用一个视频展示一下效果:
简易智能家居中控系统(获取传感器实时数据)